
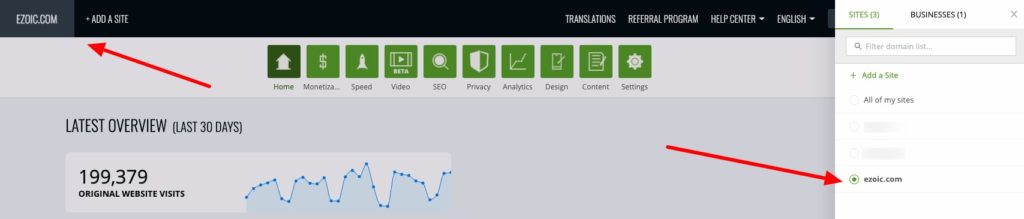
In order to access SFTP when your site is hosted on Ezoic, or when setting up a hosting transfer to Ezoic, the first step you need to take is log into your Ezoic account. Next, ensure the website you have hosted or plan to host with Ezoic is selected in the upper left of your dashboard.
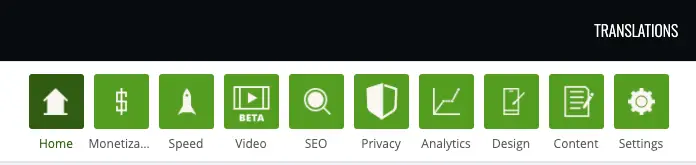
On the dashboard, head over to the settings tab on the far right. On the settings page, scroll all the way down until you see the WordPress Hosting tab.

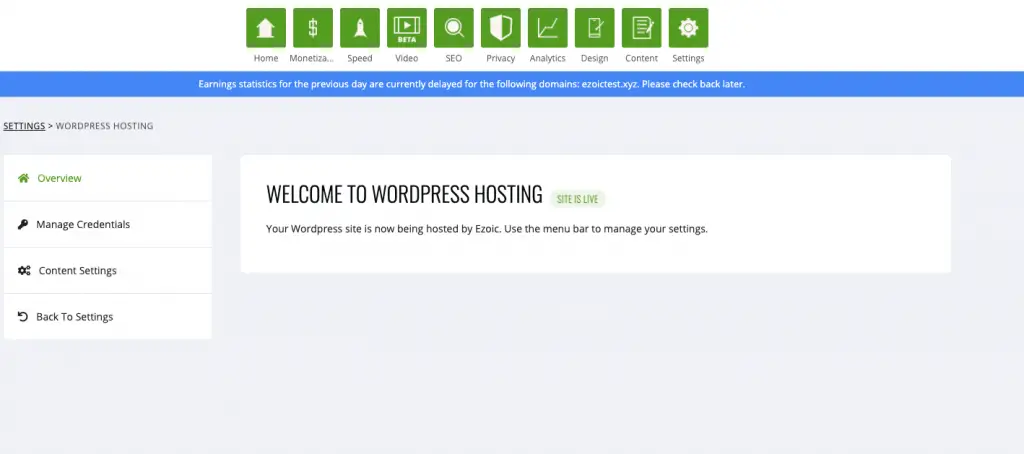
Click on the Go to WP Hosting Dashboard button and you will see a Welcome to WordPress Hosting page.
This is where you can manage and establish an SFTP connection or select the method you’d like for setting up a WordPress site hosted with Ezoic (only available for Monetization users).
SFTP Transfer is the best method for sites transferring a site hosted elsewhere to Ezoic in most scenarios.
On the page, navigate to Manage Credentials to access your SFTP Credentials and Database Credentials.
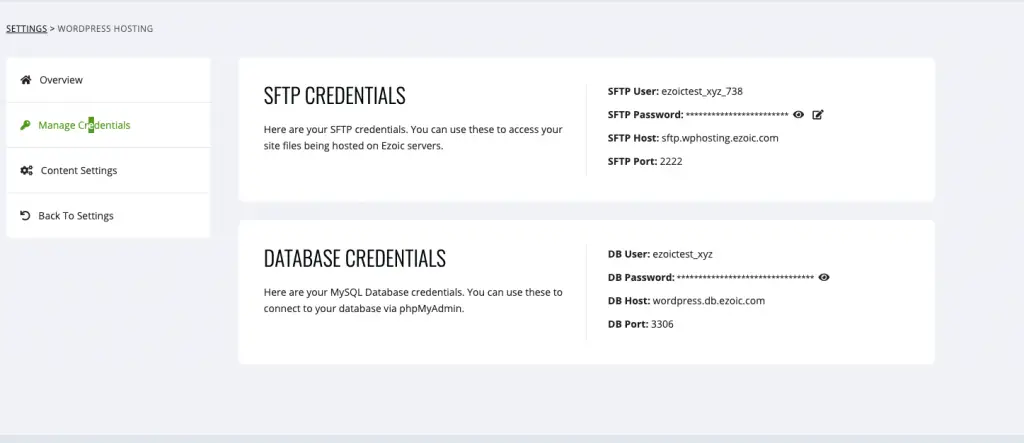
With these credentials, you can install a SFTP client like Filezilla
(https://filezilla-project.org/ ) and input host, username and password for our hosting server file system (credentials in pub dash wp hosting) SFTP just means secure file transfer protocol so just moving files from servers)
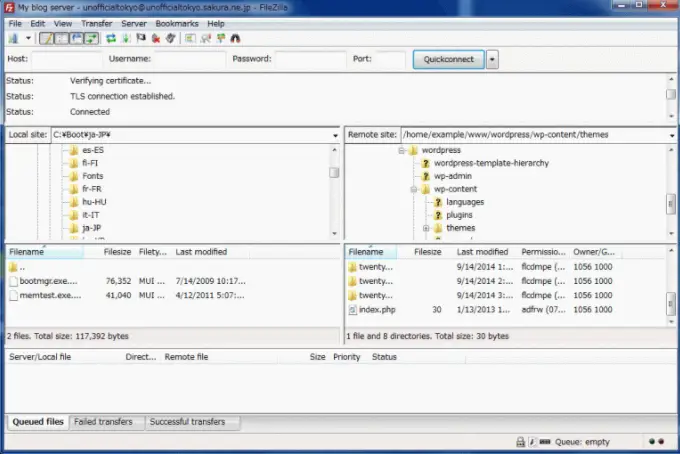
FileZilla is an open-source FTP-client and FTP-server. The FTP-client is available for multiple platforms such as Windows, Linux, and Max OS X, and the FTP-server is available for Windows only
Filezilla FTP-client may be used to manage your WordPress site by uploading and downloading files and images.
You will need to input host, username and password for our hosting server file system and you can find the credentials in pub dash wp hosting.
If you do not already have an FTP account on your server, use your cPanel or website administration tool to set one up – it will have all the information needed. If in doubt, ask your host for directions or help regarding an FTP account for your use to access your webspace.
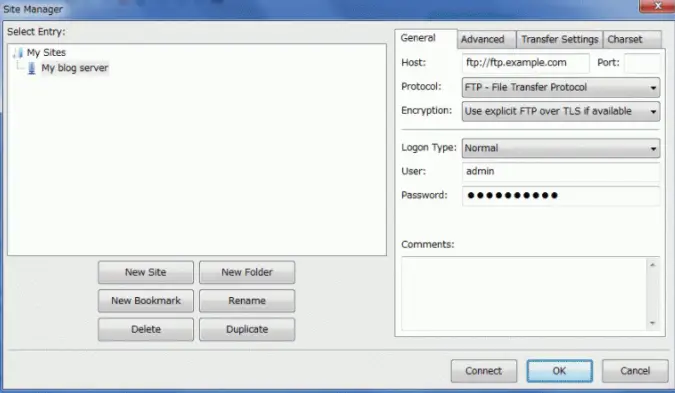
Before connecting the FTP server, you should register it in the Site Manager. Once you register it, you just one click to connect to the same server.
- Click File > Site Manager from FileZilla main window.
- Click New Site then name the new connection to what you want (example: My blog server).
- Enter the ftp address for your website in Host box. Usually, if your website is http://www.example.com, then the ftp address will be ftp://ftp.example.com or ftp://example.com. Note: Do not put a / at the end unless specifically told to do so on your cPanel or by your host.
- Leave the Port box blank. Default value 21 should be used. Only change these if your FTP account details explicitly indicate that you should.
- Select Normal from Logon Type box
- Enter the full username that you have been given in User box. It may be just a username, or it may look like an email address (but it isn’t one). For instance, it would look similar to user or user@example.com.
- Enter password. Remember that the password might be case sensitive.
- Click OK.
Connecting
In the toolbar of the FileZilla main window, select the down arrow of the most left icon “Open the Site Manager” and select your FTP server from the drop down list.
Or, start Site Manager from File > Site Manager, select your FTP server and click ‘Connect’.
If all is well you will see a series of messages and in the large window you will see a listing of the files appear.