Add Tables To WordPress Without Plugins
Interested in using Tables on your WordPress website, but don’t want the added bloat that plugins often add? Luckily, adding a table to your WordPress pages isn’t that difficult and you can improve your website speed by using some of the tips to avoid plugins and tools that load excess JS and jQuery on every page of your site.
TablePress and similar table plugins are a pain point for site speed. While the plugins are great at delivering a unique and flexible front-end interface for adding, customizing, and adding tables to a WordPress site, they load all the code needed to make every kind of table on every single page. Most sites use a very small fraction of what these plugins load on each page, despite many publishers using them on less than 1% of all pages.
Building and adding custom tables in WordPress
The simplest way to build custom tables to fit your site is by using plain-old CSS…
… but wait… before you say, “…but I don’t know CSS”!
We’ll show you a way to develop, add, and customize tables in CSS without any coding background or technical skills using just a few steps.
In this tutorial, we’ll be using a free CSS Cheat Sheet tool and table-building styler that allows you to build tables to your exact preferences. Then, we’ll show you how to add this as a custom style to your site and add tables to your pages (often in ways that are easier and faster than plugins, like TablePress).
Getting started with plugin-free WordPress Tables

Tested On…
This technique was tested and proven on sites using basic WordPress themes, like Twenty-TwentyOne, using Gutenberg Block Editor and Classic Editor.

Time Required
Creating and adding tables this way shouldn’t take more than a few minutes. Then, depending on the number of styles needed, subsequent tables should be even faster.

Tech Required
As mentioned above, you’ll likely want to use this Custom CSS Cheat Sheet and a Custom Table-Builder available from these hyperlinks.
Building custom WordPress tables using CSS
First, we’ll start by using this simple table-styler tool that provides a free mechanism for designing and styling tables using a user-friendly front-end interface.
HTML TABLE STYLER USED IN EXAMPLE AVAILABLE HERE
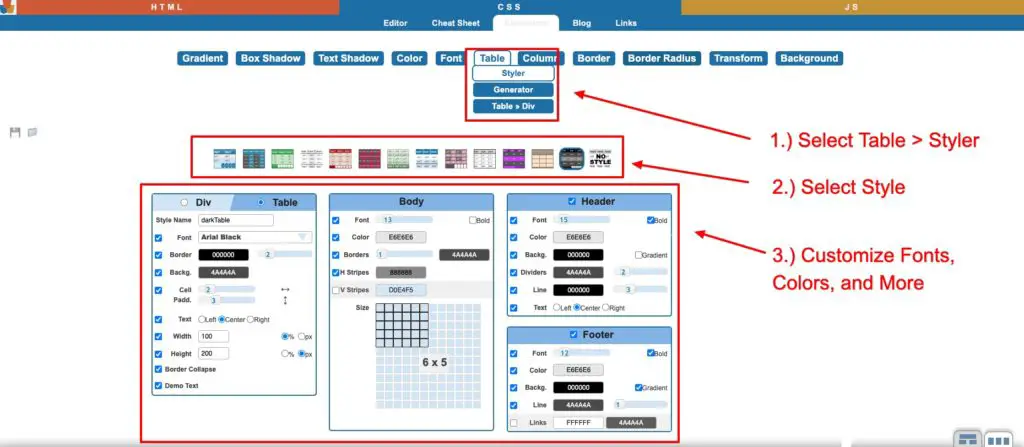
In our example, below we used one of the selected template styles and ensured that our font was web-safe to avoid potential fonts from adding to page load times.
We designed the table to fit with the general style of our site and then we used the Table Generator to begin actually typing in fields and building a table within the tool.
Note: Once you make a sample table, if you elect to use this kind of table (same style) on your site in multiple places, you’ll be able to edit and change it in your sites block-builder UX/UI in the future (see the bottom of this tutorial)
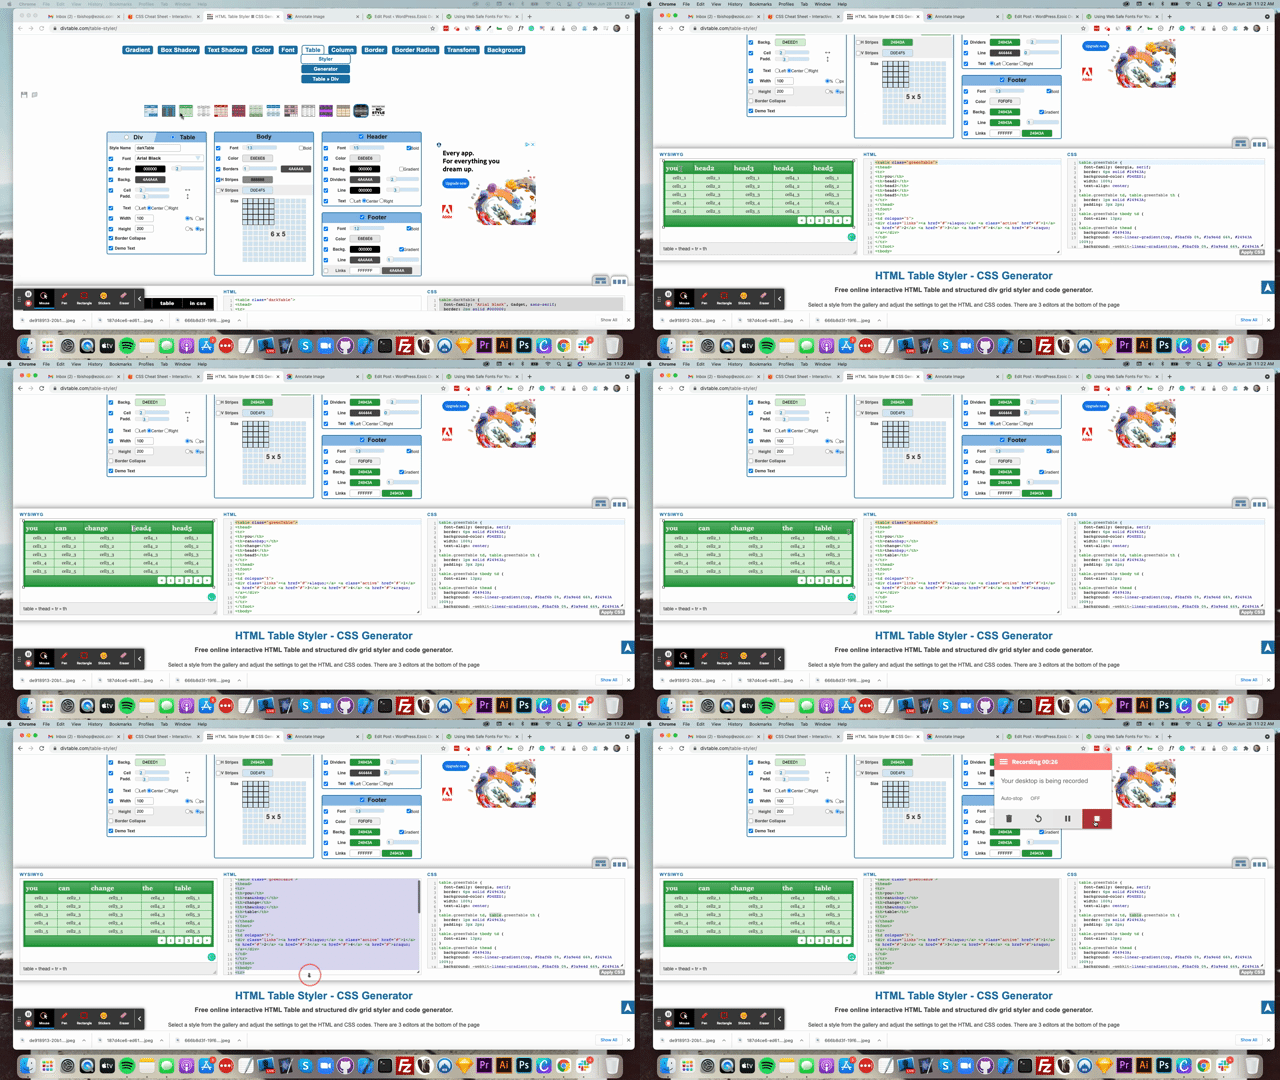
For our sample table, we add the CSS to WordPress
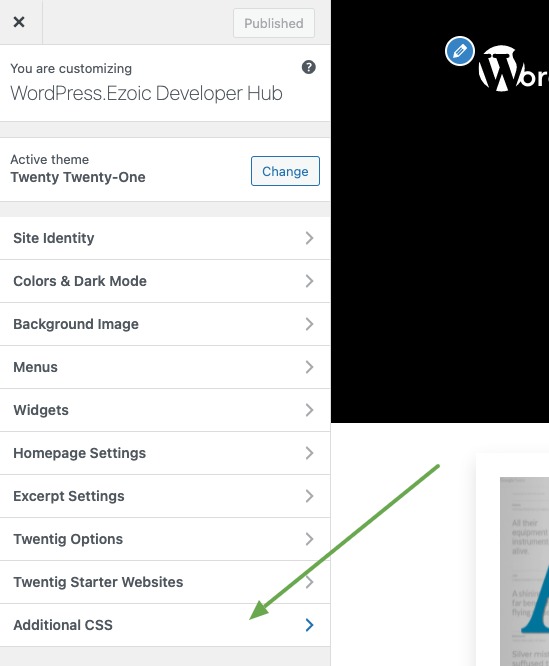
Login > Customizer
Login to your WordPress admin and then navigate to your homepage and select the Customizer option at the top of your admin bar (or wherever your “add custom css” area is)
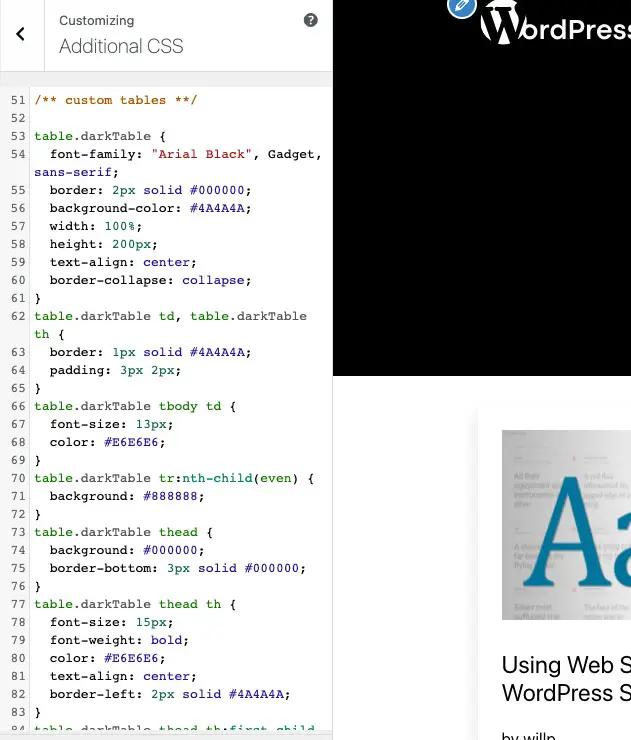
Copy/Paste Custom CSS
Take the custom CSS from the Table Styler Tool (located in the far right of the tools UI next to the table your were building in the tool) and copy it.
Then, paste the CSS into the Custom CSS area of your Customizer > Custom CSS area.
You can add:
/** custom table css 1 **/
before and after the custom CSS if you have other custom CSS added to your site’s theme.
Adding a custom table to a page or post in WordPress
Now, we’re ready to add the sample table to our site.
All we need to do is copy the HTML code (see below) from the tool editor after we’ve designed the table we want for our WordPress site.
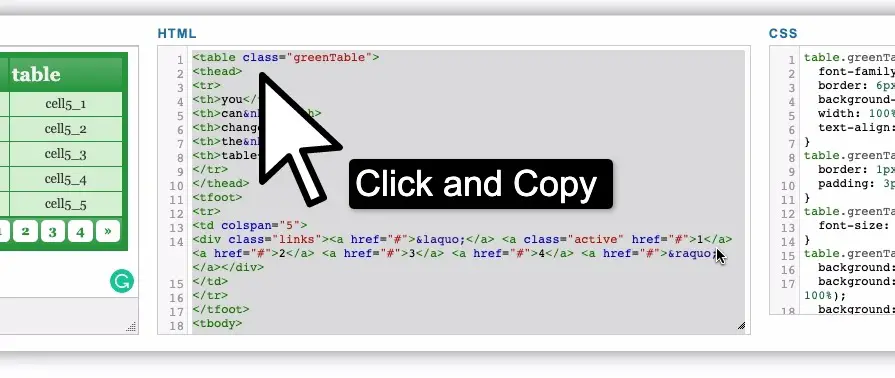
Note: You can make the table exactly as you’d like it to appear on the site, or simply create a dummy table you’ll edit once you’ve added it to the page or post.
Now, login to your WordPress admin and navigate to the editing screen on the page or post you’d like to the table to appear on. From here, you’ll want to create a block to edit as HTML where you’d like the table to appear on the page, or you can use the code editor option in Classic Editor or Gutenberg to choose exactly where it should appear.
Option #1

Option #2

Our Example Table
| this | is | a | sample | table | in css |
|---|---|---|---|---|---|
| cell1_1 | cell2_1 | cell3_1 | cell4_1 | cell5_1 | cell6_1 |
| cell1_2 | cell2_2 | cell3_2 | cell4_2 | cell5_2 | cell6_2 |
| cell1_3 | cell2_3 | cell3_3 | cell4_3 | cell5_3 | cell6_3 |
| cell1_4 | cell2_4 | cell3_4 | cell4_4 | cell5_4 | cell6_4 |
| cell1_5 | cell2_5 | cell3_5 | cell4_5 | cell5_5 | cell6_5 |
| foot1 | foot2 | foot3 | foot4 | foot5 | foot6 |
That’s it. You can see our example we made via this method above.
Keep in mind that once the table is added to your site, you can then re-use this same table and CSS class on other pages by copy/pasting it and then customizing within your own editor.See below.
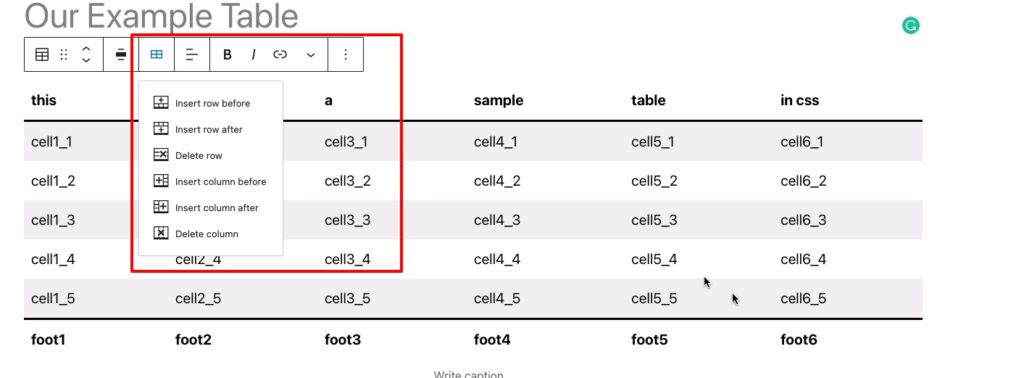
In the future, you can copy this table and customize it on other pages. You can also use the entire method shown above as well to add and customize tables specific to different pages and posts. If you find the free HTML/CSS editor to be easier, feel free to use it to add and customize the tables before adding them to pages.

