A “placeholder” is a potential ad location. We recommend adding at least 10-15 placeholders on your website so that Ezoic’s AI has more places to test. This means Ezoic will be able to find more combinations for different advertiser demands, driving up ad rates for each visitor. It also means ensuring visitors don’t bounce because certain ad combinations are known to cause shorter sessions.
Placeholders are anywhere an ad could show on your website, NOT where an ad will show every time. 10 placeholders could result in only 5 ads being show across any of the 10 placeholder locations.
How to hard code placeholders into a WordPress theme using AD Inserter
Editing a theme can become a pain because any changes are overwritten when the theme is updated. For this reason, a child theme is recommended for making changes to a theme; however, for placeholders, the most dynamic way of adding placeholders across all themes successfully is by using a lightweight plugin, called Ad Inserter.
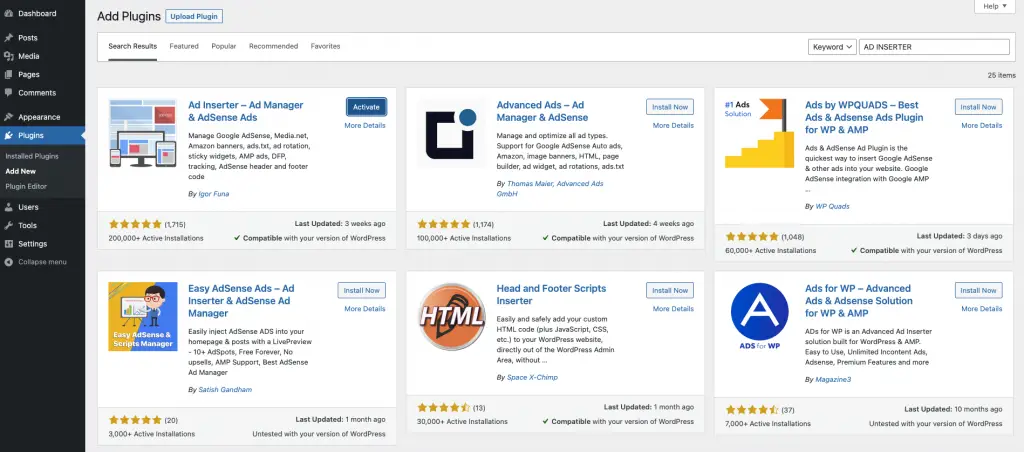
To get started, go to the admin page of your WordPress Site and install the AD Inserter Plugin. Next, you want to activate this plugin and then you will see AD Inserter appear under settings.
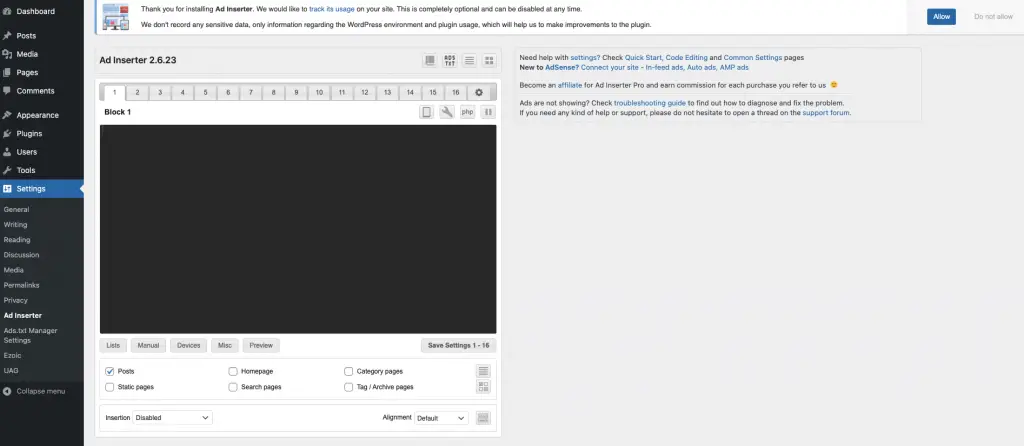
Select Ad Inserter and you will see a bunch of blocks. These blocks are where we’re going to add the placeholder code and customize the locations to get the placeholders where we want on the website.
Watch the video tutorial for quick setup
Creating Placeholders
You can create new placeholders either by manually adding the HTML code Ezoic generates for you or automatically with our Ad Tester Chrome extension. With the extension, you can preview the placeholders on the site and control which size ads are shown on different services.
For the purpose of this article, we will be discussing how to put hard code placeholders manually into your website. To create placeholders manually, navigate to the Ad Tester app located under the ‘Monetization’ tab in your Ezoic Dashboard.
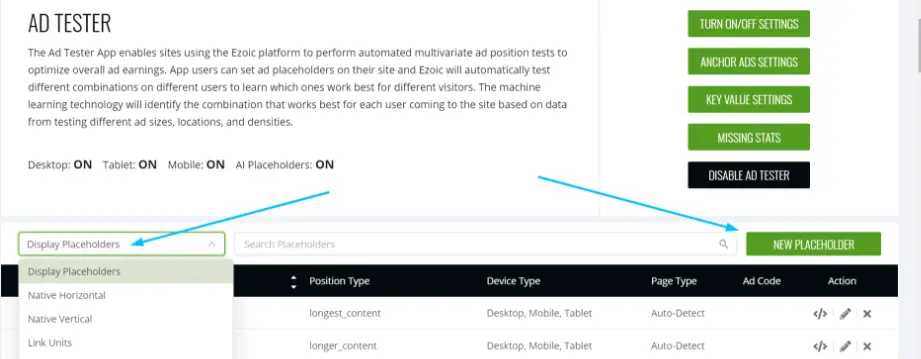
Click the dropdown meny to select the type of placeholder you wish to add. Select ‘New Placeholder’ button to create your new placeholder.
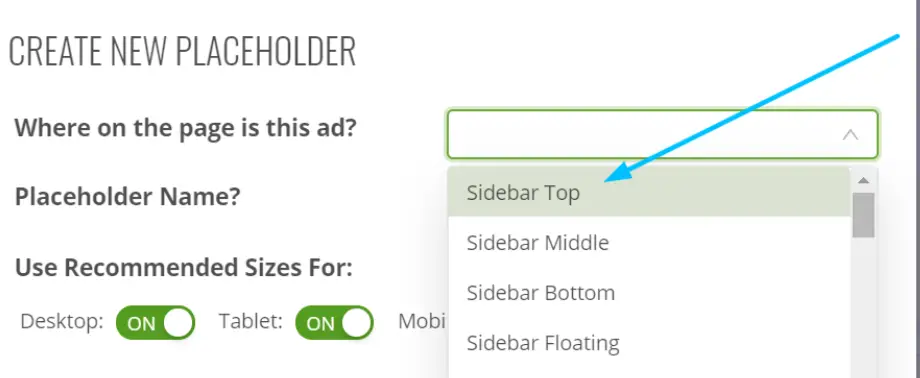
Select the ‘position type’ for the placeholder and give it a name. This lets the system know where the ad is located relative to the page.
The twelve position types are: Sidebar, Sidebar Middle, Sidebar Bottom, Top of Page, Under Page Title, Under First Paragraph, Under Second Paragraph, Mid Content, Bottom of Page.
We recommend creating at least one of each position type.
Next, enable the devices the placeholder will appear on.
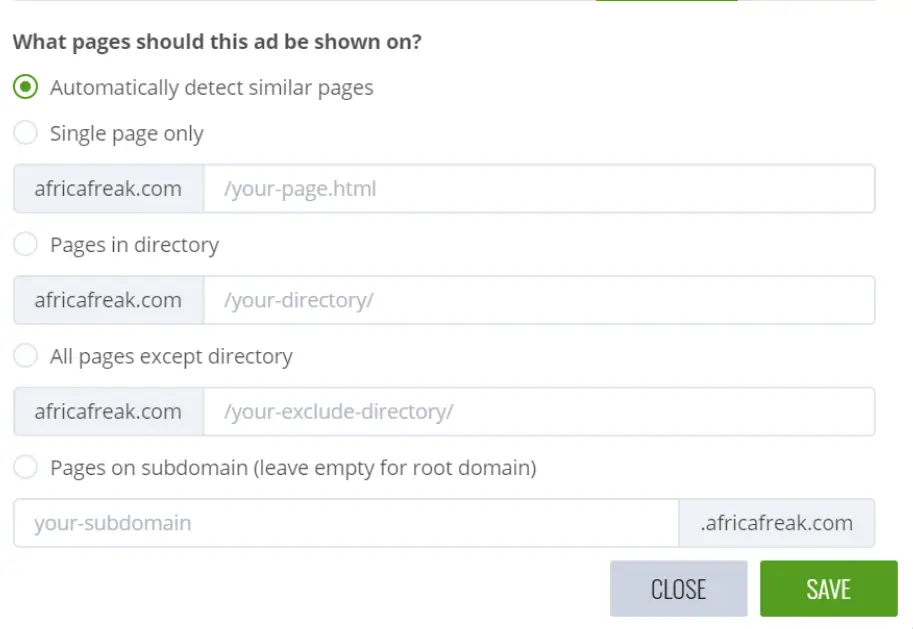
Designate specific pages for the placeholder to appear or allow the Ad Tester to automatically reproduce it across similar pages on your site.
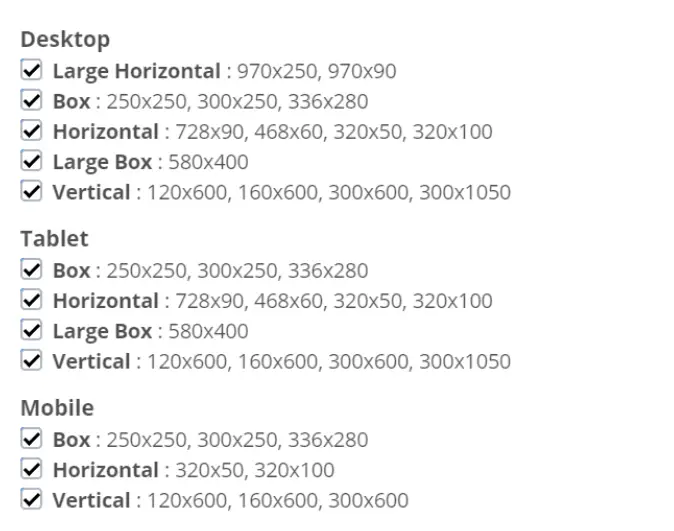
Select the ad sizes you wish the system to rest in that placeholder location. It’s important to include as many sizes that fit in that location as possible. The default settings will show you what sizes we recommend for each device, but if you want a 728 x 90 Leader o
on Mobile, for example, then you must toggle it on by clicking the checkbox next to ‘Mobile’.
You can select the ‘Always Compete’ option if you want to ensure that size ad is an option should that placeholder be chosen by our system.
When you’ve created the placeholder, click the button indicated below in your placeholder list.

Then simply copy and paste the ad code into the location you want the ad to display on your site.
Then repeat! You can repeat the process until you have a variety of different placeholder position types. Alternatively, the Ezoic Chrome Extension is a great tool to help you do this automatically. Also, you do not want to create 20 ad placeholders in a single area like a sidebar. Keep in mind that while the number of placeholders you create is important, achieving a good spread of placeholders across your website is equally as important.

